Six things you need to know about sun tunnels
-
 Sterlingbuild
 - Advice & Guidance
- 17 Apr 2015
- 1340views
- Reading time: 7 minutes


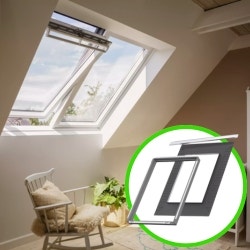
A sun tunnel can really transform your property, but for those who don’t know much about them, we’ve put together a handy guide to tell you all you need to know.
When it comes to improving a property without breaking the bank, while also adding light and style with ease, sun tunnels have been incredibly popular in recent times. Sun tunnels – otherwise known as light pipes or sun tubes – have the ability to completely transform a dark or windowless room into an area full of natural light and energy.
However, not everyone is familiar with sun tunnels, so as such, we’ve put together a useful six-point guide to help you understand all you need to know in your pursuit of welcoming more natural light into your home.
What is a sun tunnel and how does it work?
In short, a sun tunnel channels sunlight from your roof down a highly reflective tube and into a room below. With a sun tunnel, areas of your home where it hasn’t previously been possible for natural light to get to before can now have it pouring through. Sun tunnels can be installed on a pitched roof or on a flat roof to allow daylight to flood the rooms where it’s most required.

What options are available for a sun tunnel?
The sun tunnel itself is available as either a flexible or rigid option and both have their own benefits and differences.
Rigid sun tunnels give you a better light transmittance than the flexible sun tunnel and also allow for the light to channel down the tube from the roof to the ceiling in a direct motion.
This is because the less the light bounces off the internal surface of the tube, the more natural light you will get in the required room. Generally speaking, rigid sun tunnels can offer up to 20m of effective light distribution.
Flexible sun tunnels meanwhile cost less and are much better for shorter distances, as the flexible tube allows you to negotiate around any obstructions in the roof space. However, due to the build of the flexible tube, light will reflect less than a rigid sun tunnel.
The VEW flexible light tunnel with a 3m tube for tiles does combat this though and not only comes with a 10-year guarantee, but also offers 86% reflectance.
Rounded dome or flat glass cover?
You may have noticed that some sun tunnels have a dome that sits on top of the roof, while others have a flat glass panel instead.
These panels are certainly very stylish and can be installed to match existing windows, while the domes are also very aesthetically pleasing and will certainly be a standout feature on your roof.
However, there is more to them than just their appearance and it’s important to note just how the light reflects off a flat surface, but refracts when it meets a clear dome.
Essentially, this means once the light hits the flat panel, some of the light is lost by means of reflection, so with that in mind, domes stand out as they actually refract the light inwards, thus capturing extra light compared to their counterparts.


Where should I position it?
If you have a flat roof, then this is a point you can skip – but if you don’t and want a sun tunnel, one thing you will need to consider is the position of it on your roof.
Regardless of whether it is flexible or rigid, south-facing gardens see the most amount of sunlight during the day and therefore, are seen as the ultimate sun trap.
With this in mind, installing a sun tunnel on the south-facing side of the roof – or the side of the roof that is as close as possible to south-facing – will mean your sun tunnel will get the most amount of natural daylight available.
This combined with making sure the installation of the sun tunnel is a close to the apex of your roof as possible means that you will get the most amount of natural daylight available.
However, if you do not live in an area where ambient light comes from the south, it’s worth noting that north, east or west facing roofs will still make a huge difference!
How many sun tunnels do I need for my room?
This is something that is entirely up to you, but the more sun tunnels that you install, the better your results will be.
Much like with vertical windows and skylights, the more space you give daylight to get into your room, the better the results.
As such, it would be wise to purchase the biggest size you can and try and aim for one or two sun tunnels to be installed in the centre of your room.
Alternatively, you could install a handful of smaller sun tunnels and evenly space them around the room, but it depends on what you want for your property.
What is very useful about sun tunnels is that they are suitable for any room and won’t look out of place – the question is how would you personally approach it.
This chart shows which sun tunnel size is best suited to a type of room:
Tunnel diameter Room size Room type
23-25cm 4-10m2 Hallways, corridors, small rooms
32-45cm 11-15m2 Large hallways, stairwells, bathrooms
52-55cm 16-22m2 Kitchens, bedrooms, living rooms


What other perks does a sun tunnel give me?
Well, it’s a proven scientific fact that natural daylight is good for your health and wellbeing – in fact, you can read a guide about it from us here – but it’s also very good for your bank account too!
By choosing to install a sun tunnel in your home, you’ll automatically see the benefits on your energy bill as you have a free stream of light.
Also, as an added bonus, your home will also become warmer with the added welcome of natural daylight!
If you have any questions about sun tunnels, please get in touch with our team.